How To Edit Pages Using The Enfold Theme
The Enfold Theme uses an Advanced Layout Editor, which allows you to easily set up complex pages and add various elements.
Below are two videos which explain how the Advanced Layout Editor works and further down the page you will find step by step instructions to:
– How to Edit an Existing Page
– How to Add a Page to The Menu
– How to Add Photos to a Photo Gallery and Change Order of Photos
How To Manage Your WooCommerce Orders and Products
WooCommerce is a very easy to use yet very powerful e-commerce platform.
Below are some instructional web pages that will help you manage your Orders and Products:
How to Edit An Existing Page
Firstly login to your WordPress account, using the information provided.
Once you arrive at the Dashboard, click on
Pages
-> All pages
This will show you all the existing pages on your website.
To edit an existing page, simply hover your mouse over the page and click on “Edit”
Click once over the page element that you wish to edit.
When you are done, hit “Save” in the bottom right hand corner.
Then click on “Update” in the top right hand corner
How to Add a New Page
Login to WordPress Account
On the left hand side of the Dashboard
Click on “Pages”
Click on “Add New”
You will be presented with the following screen.
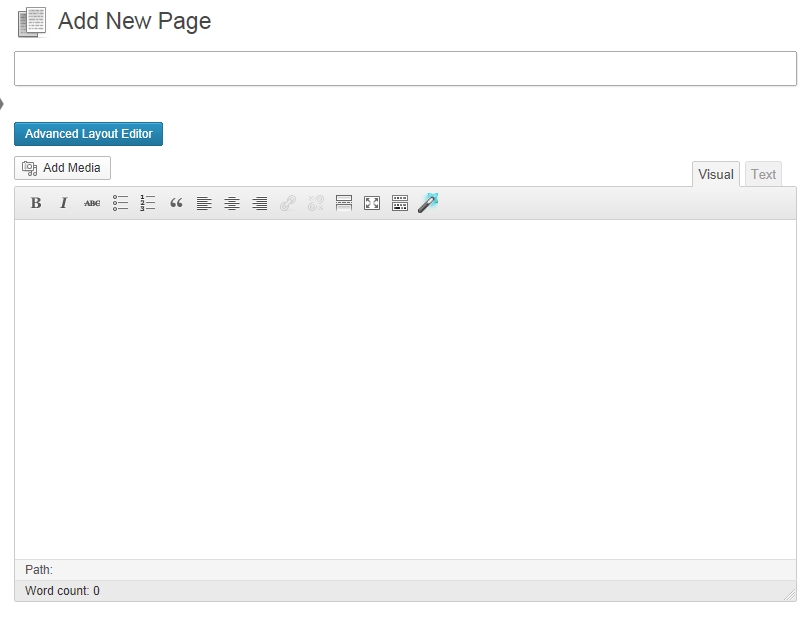
Enter page name where it says “Enter title here”
Click on “Advanced Layout Editor” and you will be presented with the following screen, with 3 tabs at the top
Layout Elements – lets you choose the layout of a particular page
Content Elements – lets you choose what type of item you wish to insert, eg. text, list, button etc
Media Elements – lets you insert images, videos, galleries, animation sliders
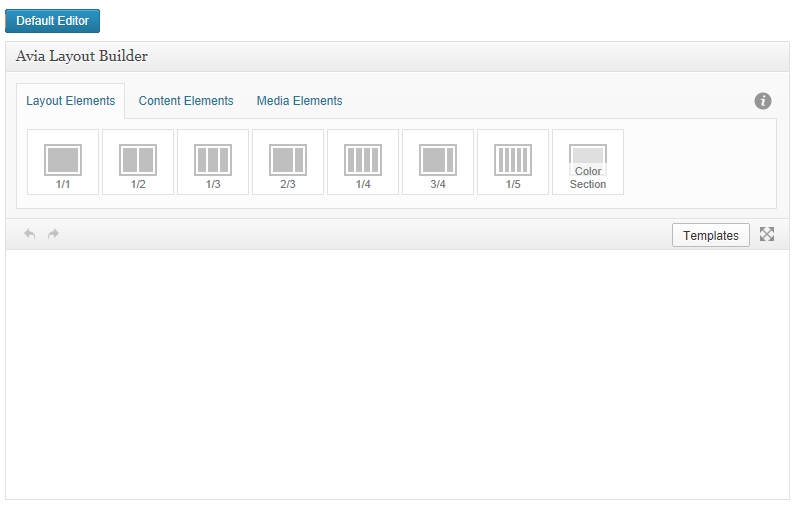
Firstly drag and drop in the layout elements. For example 1/2 and 1/2 means the page will be divided into two halves. Or 2/3 and 1/3, etc.
You can also add in a “Color” element first, which will allow you to insert different coloured background or even place images in the background. If you wish to use this feature, drag and drop it in first, followed by dragging and dropping in the layout elements.
Next, click on the “Content Elements” or “Media Elements” tab and drag and drop one of the content elements over the layout element (Tip: drop the content element when the layout elements is highlighted in green – this will ensure it gets placed within the layout element).
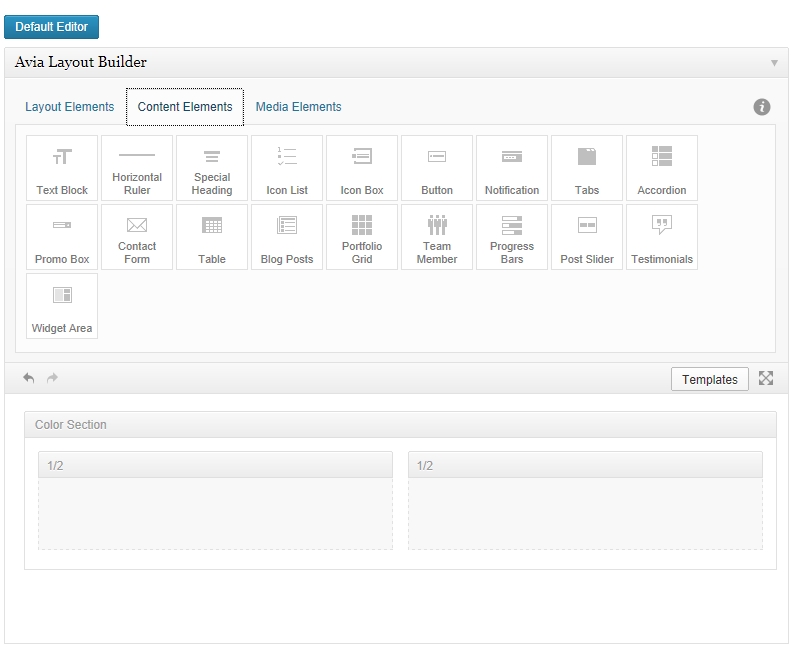
Once you finish adding in the information/images, click on “Save” bottom right hand corner.
At this point, you can choose to place your new page under a particular section. Simply find “Page Attributes” on the right handside of the “Add New Page” screen and where you see “Parent” click on the down arrow to choose the “parent” page.
Click on “Publish” top right hand corner.
If you wish to make changes to the page, don’t forget to click on “Update” to ensure the changes are published online.
Please note: You can switch to the WordPress Default Editor by simply clicking the button which says “Default Editor”.
How to Add a Page to The Menu
If you are adding a key page to your website, such as “About Us”, in most cases the page will be added to the top menu automatically. However, if you are placing a secondary page, such as “Qualifications”, you will need to manually add that to the menu.
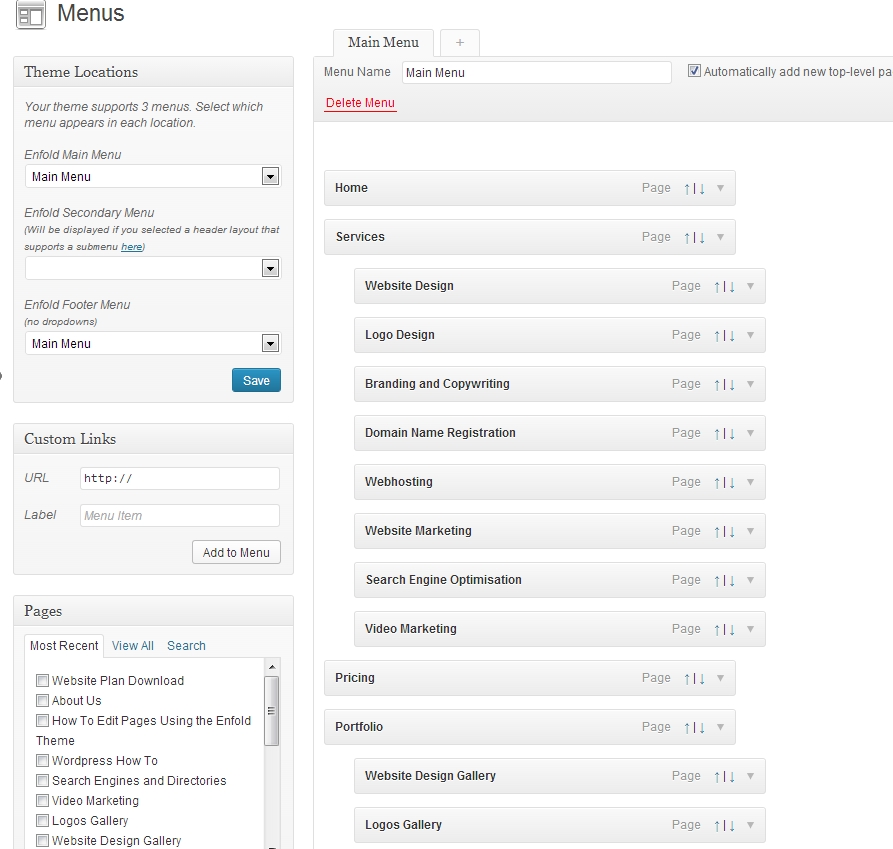
To do that, go your dashboard. Then click on “Appearance”, then “Menus”
On the left hand side under “Pages”, select the page you wish to add to the menu and click on “Add to Menu”
Then you can drag and drop wherever you wish for the page to display.
Don’t forget to “Save Menu” when you are done
How to Add Photos to a Photo Gallery and Change Order of Photos
Click on “Pages” -> All Pages
Place your cursor over the Photo Gallery page you wish you edit
You will see a menu come up underneath, click on Edit
Click on the field that says “Gallery” or “Fullwidth Masonry Gallery”
It will show all the photos in your gallery
At the top, click on “Add/Edit Gallery”
On the left hand side you will see a link, which says “Add to Gallery”
Click on that
Then click on upload files (top left hand corner)
When you have found the file on your computer Click “Add to gallery”
The image will be added to the bottom of your photos.
When you are in the “Edit Gallery” window, you can simply drag and drop the images to change their order.
When you have finished making changes, click on “Insert Gallery” (bottom right hand corner)
Click “Save” (bottom right hand corner)
Click “Update” (on the right hand side)
How to Add Links to Your Links Page
Click on “Pages” -> All Pages
Place your cursor over the Links page
You will see a menu come up underneath
Click on Edit
This will open up the Links page
Click within the right box, where the text appears
This will open the edit window
Here you can simply type the new text
To link to someone’s website, simply type the website address, eg “www.web4business.com.au”.
Then highlight the text, ie. www.web4business.com.au
Then click on the “Link” button, which looks like this:

This will open a new window.
Type in the website address (URL) of the business and ensure, it includes the http://, eg http://www.web4business.com.au
Click “Update” (bottom right corner)
Click “Save” (bottom right corner)
Click “Update” (on the right hand side)
How to Add PDF Document to Your Website
If you are adding an Announcement or document to list:
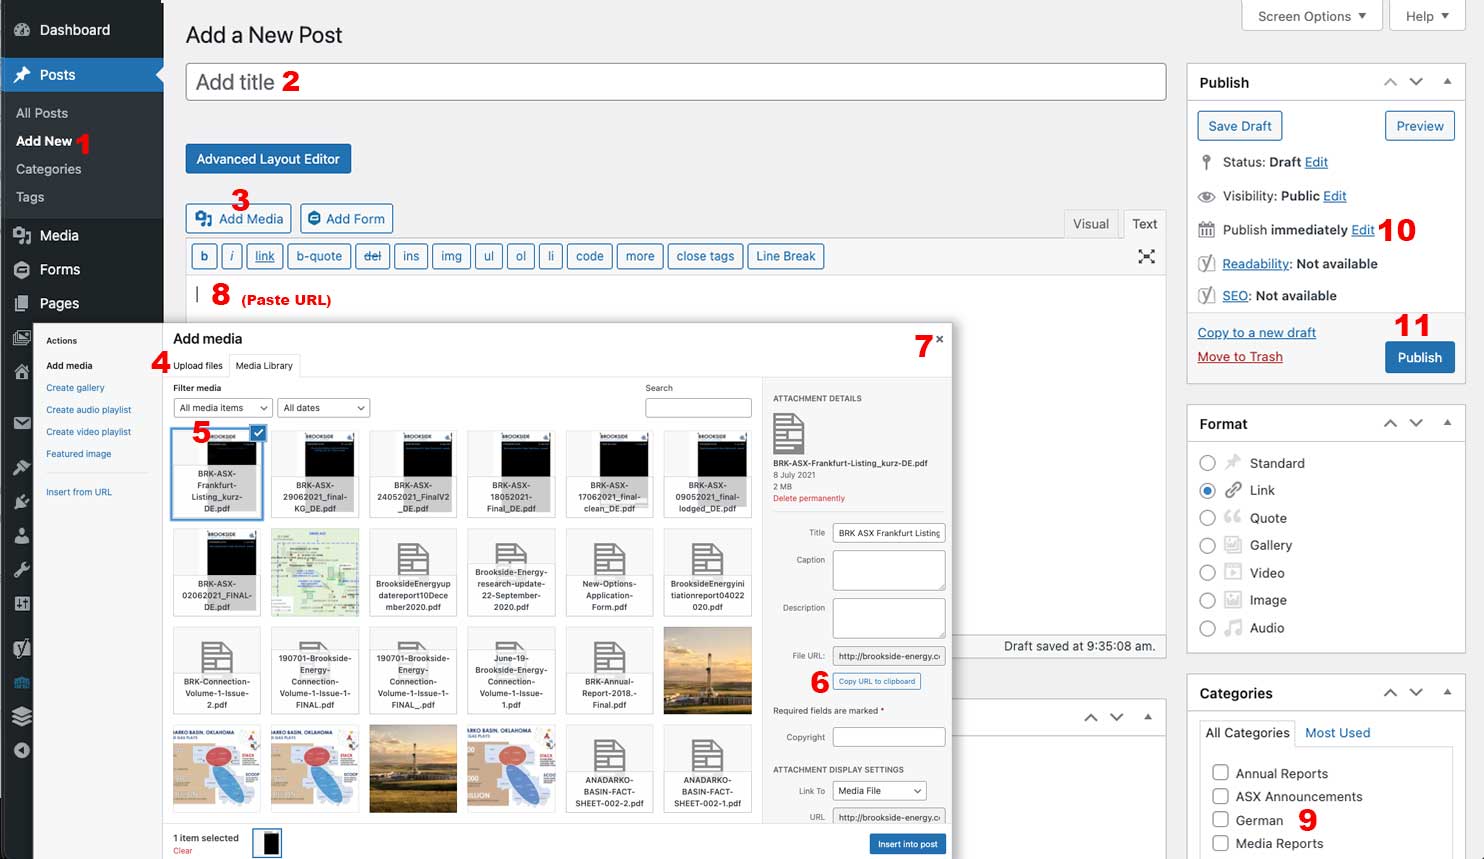
- Go To Posts, click on ‘Add New’ button
- Enter the title of the Document
- Click the ‘Add Media’ button
- Upload your pdf
- Select the file you wish to add
- Click the Copy URL to clipboard button
- Close the popup window
- Paste the URL into the content box (ensure that you are using the ‘Text’ tab, not the ‘Visual’ tab on the right hand side.)
- Select the Category and Format should be ‘Link’
- On the right hand side edit the Publish date if you wish the date to be other than today
- Click Publish.
If you wish to link a pdf from text or an image on a page within your site:
Click on “Media” on the navigation bar
Click on “Add New”
Navigate to where you PDF document is on your computer or simply drag and drop it into the media library
Once the document is uploaded, click on the file
This will show you the information about the file
Copy the path of the file, next to where it says URL
Paste the URL somewhere where you will have easy access to it, such as Notepad or Word
Close the window of the document
Go to Pages
Navigate to the page where you wish to include the PDF document
Click on Edit (below the page name)
Insert a Text Box to where you wish the PDF to go to
Select the text you wish to link, or insert a small thumbnail image of the PDF document (this can be a png or jpg file) and once inserted, select it
If using an image you will see a Pen symbol come up (this allows you to edit the image), click on the pen
Where you see “Link to” select “Custom URL” and in the blank space below, simply add the URL of your PDF document which you saved earlier on.
If using text to link, once selected click on the Link (chain) icon in the editing toolbar and paste the link into the box that appears. Then click on the blue arrow to close the box and apply the link.
Click “Update”
Click “Save”
Click “Update” on the page.
